


|
Foilbacking
There are many different types of paper to fold out there. Some are easier than others to fold, some produce more attractive models. Foilbacking is a technique where layers of paper are glues to sheets of foil. This allows crisper folds and allows the paper to be shaped more easilly. For folding some models, such as super-complex insects, foilbacked paper makes life much easier, and the results far more attractive.
How to create foil-backed paper
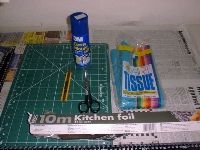
You will need the following items to create your own foil-backed paper. These can all be bought from most art shops, and the foil can be obtained from any supermarket.
|
You will need a sensible cutting board, a metal ruler and a craft knife. You can use a high quality one, or one with disposible blades. This is safer than using a standard pocket-knife and produces better results. Scissiors come in useful. You can use any sort of paper, however, thin tissue paper works best. Interesting textures can be obtained with crepe paper and other types. You will need some spray glue, such as craft mounting glue. You will also need some kitchen foil, such as aluminium foil. This comes in various sizes, and turkey foil is pretty big. Finally, you will need a work surface lined with newspaper, in a well ventilated room.
|
|
|
|
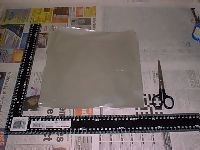
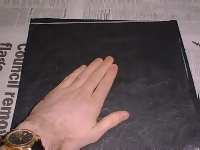
Firstly, select a piece of foil and cut into a roughly square shape, or any other shape you wish to fold on. This does not need to be exact as you will trim it later. Using fingers, smooth it out as flat as possible, removing all creases in the foil. Wash your hands first as greasy finger-prints can prevent adhesion of the spray glue.
|
|
|
|
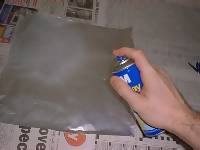
Spray one side of the foil with the craft glue spray. Hold it at a sensible distance and ensure that the foil is evenly coated with glue, especially at the edges. This can be allowed to dry a little for a couple of minutes.
|
|
|
|
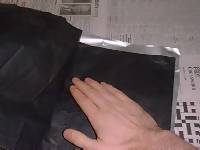
Now the fun bit! Take a sheet of tissue paper and attach to the glued surafce. The best way to do this is with three or more hands. Keeping the paper taught, gently smooth the edge onto the sheet of silver foil, at the far right of the foil. Gradually press a bit more down, and smooth flat with your fingers, taking care not to introduce wrinkles. Finally, when all the paper has been covered, smooth over with the flats of both hands. If you do get wrinkles, put back with the hand(s) keeping the paper taught and unpeal slightly, and then relay. The nature of most spray glues will allow you to do this. Once one side is done, turn over and repeat.
|
|
|
When you have covered both sides, you kill need to smooth out any wrinkles. Tissue paper is quite accomodating, crepe paper more so, and you should try to get the paper as flat as possible.
If you wish to have slightly thicker foil-backed paper, or wish to experiment with different textures, you can glue on aditional sheets of paper. However, for each sheet you add, creases and wrinkles will become magnified.
|
|
|
|
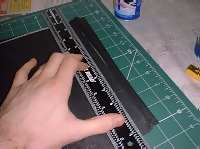
You now need to cut out your shape. I use a cutting board with graduated measurements on it, both in inches and centimeters. I also use a steel ruler tri-square so that I can measure accurately.
|
|
|
|
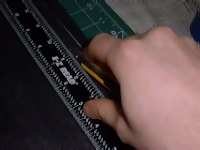
When cutting, I use one hand to keep the paper and ruler still (out of shot here) and one to hold the knife. Rather than use one long stroke pressing hard, which is prone to errors and even accidents with the knife, I make several long gentle cuts with a very sharp knife, or a fresh blade. This produces a much better reasult, although the ruler has to be held very still.
|
|
|
|
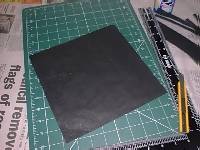
This is repeated on the other three sides to produce a foil-backed square. The glue still takes a while to dry, and so further smoothing is required to prevent distortion. You will now have a sheet to fold complex models with.
|
|
|
|
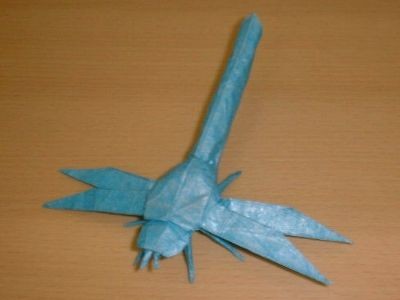
This model was created using the above technique and was displayed at the Cambridge Matsuri 2001.
|
|
|